Hockey Defensive Zone Explained: Protecting the Slot, the Crease, and Why…
The defensive zone is the area inside a team's blue line where the main job is protecting the most dangerous scoring spaces in front of the net. Understanding how teams protect the slot and crease, why they clear the puck, and how defensive structure reduces scoring chances helps beginners watch smarter and gives fans tactical context for what they see on the ice.
Quick summary: The slot and crease are the highest-danger areas in the defensive zone; teams use coverage systems and on-ice actions to deny those areas, accept lower-danger perimeter shots, and clear the puck to relieve pressure and cut down scoring chances.
Quick links: Definition | Coverage schemes | Clearing the puck
CLEAR DEFINITION
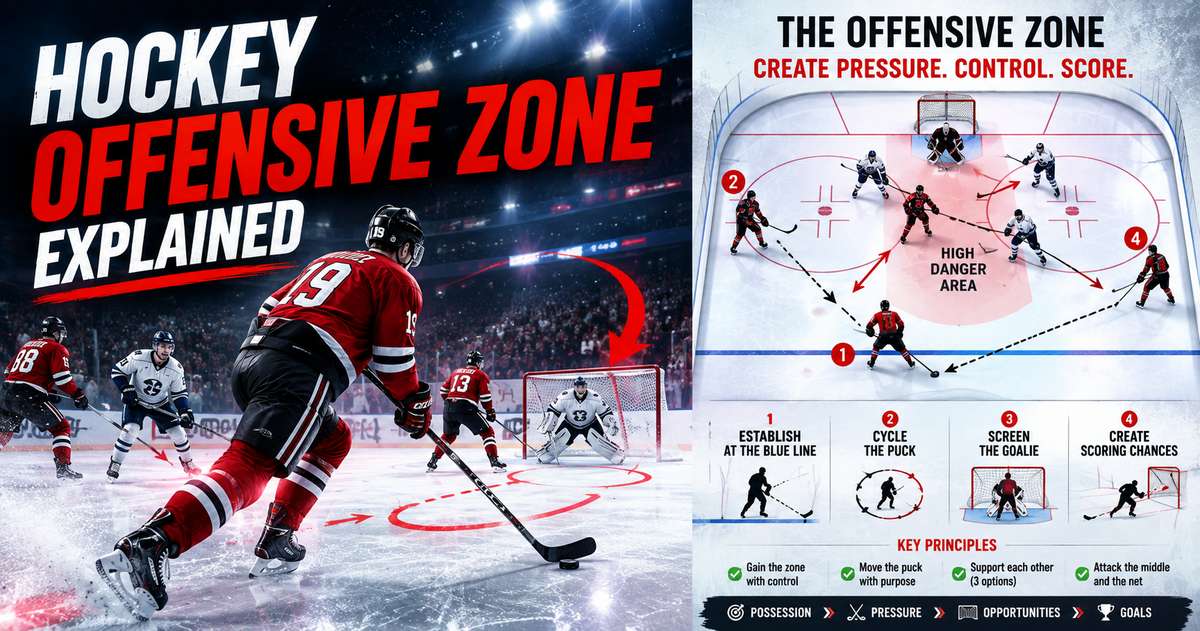
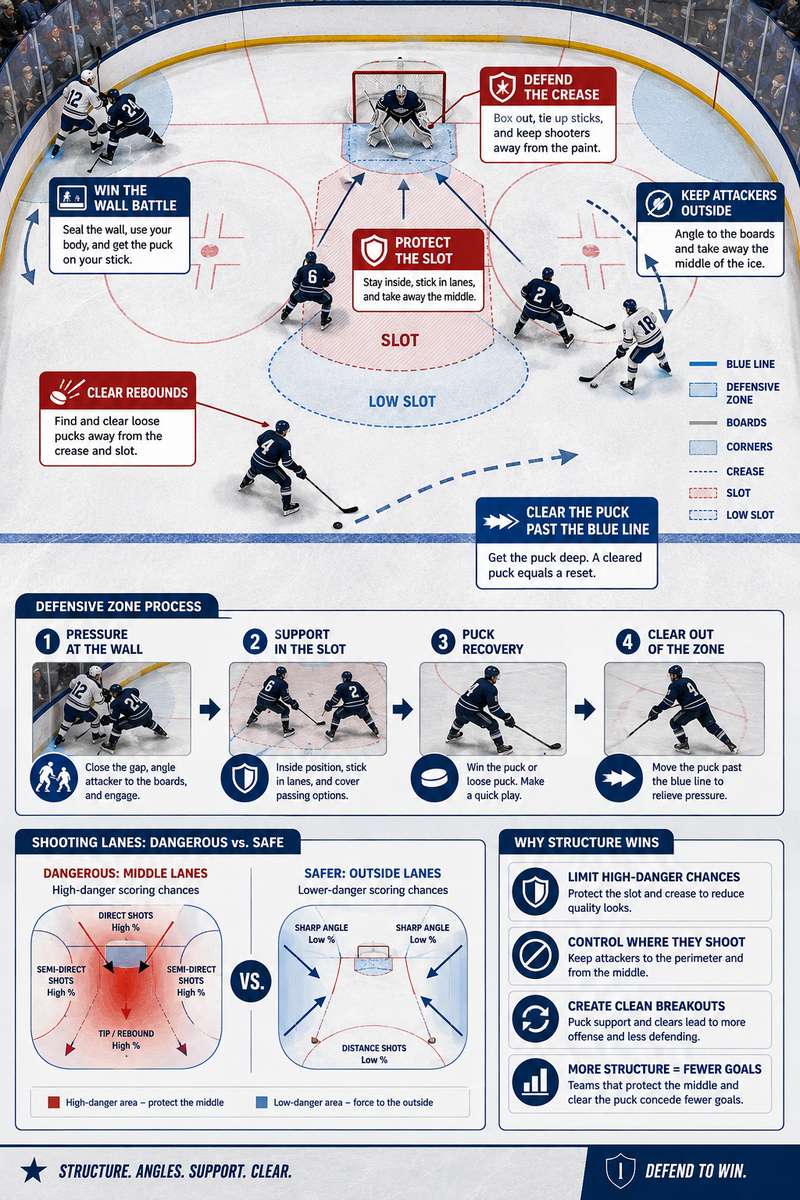
In hockey the defensive zone is the ice inside a team's blue line where defending players prioritize stopping high-danger scoring chances. Two named areas dominate coaching attention: the slot (low and high slot) directly in front of the goalie, and the crease, the semicircular area immediately around the goal. Denying space in these zones reduces tips, rebounds, and close-range chances.
HOW IT WORKS
Defensive play in this zone combines position, sticks and bodies. Teams collapse coverage or assign players to shade the slot so opponents are forced wide. Defensemen hold the points and side boards, forwards provide interior support and weak-side coverage, and goaltenders control angles from the crease. Blocking lanes, tight net-front marking, stick checks (poke, sweep, lift), and clearing rebounds are the common on-ice actions that limit high-danger chances.
COMMON COVERAGE SCHEMES
Coaching manuals and tactical guides describe several defensive-zone structures—box, diamond, 1-2-2 and compact collapsing systems—that share three objectives: (a) protect the middle and slot, (b) force attackers to the perimeter, and (c) block shooting and passing lanes. These formations trade off giving up lower-danger perimeter shots while reducing the probability of goals from the slot and net-front areas.
WHY CLEARING THE PUCK MATTERS
Clearing the puck out of the defensive zone—by rim along the boards, chip to neutral ice, a long pass, or skating it out—relieves immediate pressure and reduces sustained offensive-zone time. Fewer sustained zone possessions mean fewer opportunities for rebounds, tip-ins, and sustained cycling that create high-danger chances. Coaches and manuals emphasize cleaning up rebounds and exiting quickly to break the attacking possession chain.
PLAYER ROLES IN THE DEFENSIVE ZONE
Roles are standardized by position: defensemen typically manage the point and side boards, aiming to stop cross-ice feeds and keep pucks to the outside. Forwards act as the first and second layers of defense—pressuring the carrier, covering the slot, and taking away passing lanes to the crease. Effective zone play requires coordinated responsibilities: who picks up the trailer, who brakes off for an outlet, and who battles for net-front position.
GOALTENDING, THE CREASE, AND NET-FRONT CONTROL
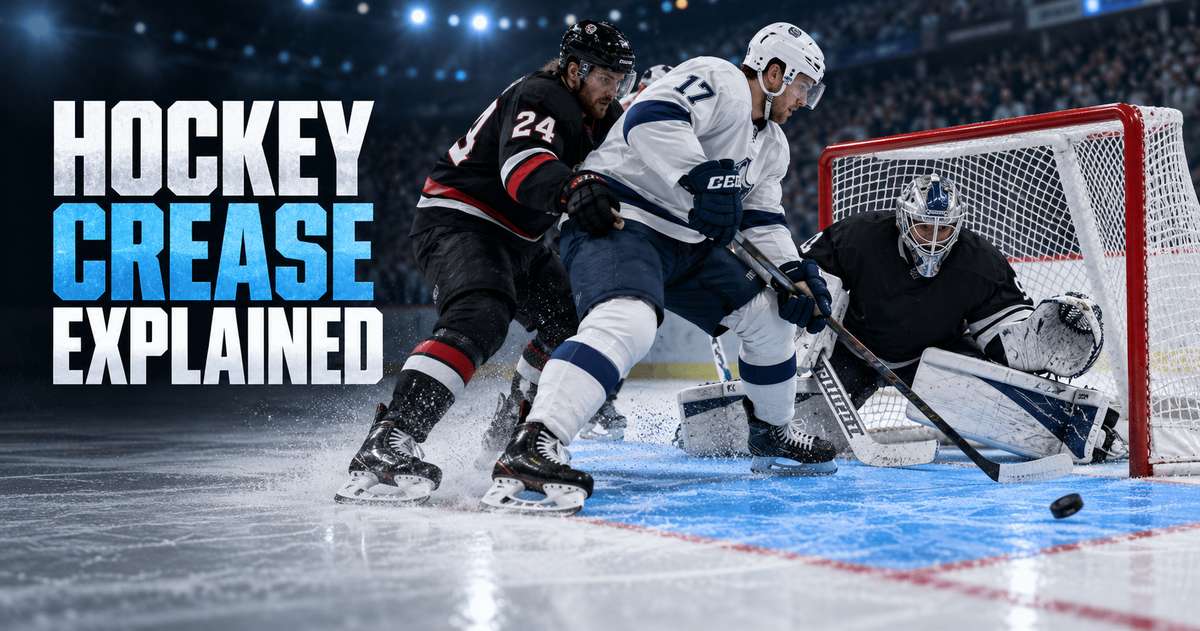
The crease is the goaltender’s immediate domain; preventing opponents from getting into that semi-circular area reduces rebound and tip chances. Goaltenders rely on position and mobility inside the crease, while teammates clear the net-front and mark screens. Tight net-front marking and rebound control are essential because many goals start with bodies and chaos in the crease.
TACTICAL TRADE-OFFS AND RISK MANAGEMENT
Teams intentionally accept lower-danger perimeter shots when they can prevent slot chances. By funneling play to the boards and point, defenders increase the distance and angle for shooters, lowering expected danger. The tactical balance is constant: pressure the puck-carrier without exposing the middle or allowing dangerous cross-ice passes that create high-percentage looks.
FAN VIEWING GUIDE
Watch how defenders position themselves between the puck and the slot, who is protecting the crease, and whether a team collapses when the puck moves behind the net. Notice cleared pucks that break sustained pressure, and value blocked shots and stick lifts that prevent immediate tips. Understanding these cues explains many coach decisions you see on the bench and why some saves look easier than they are—good structure makes saves possible.
HOCKEY ART, POSTERS, AND VISUAL LANGUAGE
In hockey posters and vintage wall art the defensive zone often appears as silhouettes around the net, a goalie framed by players or a defender blocking a shot. Those images capture the drama of the slot and crease—close contact, bent sticks, and the compact defensive shape. Posters that emphasize net-front battle or a collapsing formation visually explain what coaches mean by protecting the middle: a small, guarded space where games are won or lost.
CLOSING INTERPRETATION
Protecting the slot and crease, clearing the puck, and using structured coverage are foundational defensive responses that reduce scoring chances. They are practical, repeatable actions—positioning, stick work, rebounds control and exits—that shift the game from dangerous, chaotic minutes to controlled transitions. For fans and art lovers alike, the defensive zone is where strategy, skill and visual drama meet: small areas, big consequences, and a clear reason coaches obsess over the middle of the ice.
Author: Cynthia D.